
Guest Article by NRP & Blue March 24, 2022.
Afternoon Folks:
Let’s move on now to getting those Seeds Started.
The “Planting Season” is quickly coming upon us.
Starter Plants:
Ok, I will tell you right up front you can most likely go to any Nursery, Wally World, Home Depot, Lowe’s or XYZ store and buy probably about any Starter Plants you can imagine.
I will also say right up front that doing your own “Starts” is NOT just dropping some seeds in a cup and poof, there they are (well maybe it really is). It will take some work and you may/will have some failures.
You WILL also have a lot of successes and find something magical in growing your own from seeds.
Let’s be honest here, if you don’t have the passion in growing a Garden, and Harvesting what you put your hard work & Love into, than….. Will I don’t know what to say.
For me a Garden and everything associated with it truly is my way of getting back to Nature and honestly feeling like I’m one with the Earth.
Ok, with that said. Let’s get some Hardware ready for this phase of Gardening.
So, what ya say we get some seeds into some pots for starters?
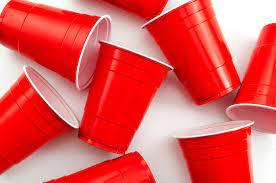
“Good old plastic Dixie Cups”
Ok, remembering me saying something about Cups?
Well there ya go, I like using Plain Old Dixie Cups for my starts. You can buy all sorts of Peat Pots, and starter trays of all sizes, but my go to is Dixie Cups.
So head on over to Wally World and get yourself a bag of these things for around $12 for ohhhhh around 270, enough to last a lifetime for sure, mainly because you can reuse them year after year as long as you don’t break them they are good to go.
Peat Pots are a one-time shot, you can get 50 about the same size as the Dixie for around $13, no thanks, and I’m cheap. BTW, I plant over 100 starts a year; that $26 bucks shot in one year, OR I can reuse the Dixies……
Also here is the main reason I do NOT like Peat Pots, you have to plant the Pot with the Start, yes you can peel off the Pot, but that damages the Plant Roots. Or if you leave the Pot on the growth through the Peat Pot is slowed somewhat and the roots inside the pot can’t absorb water/nutrients as well. I don’t care what the “experts say, I don’t use them.
One more thing, I do NOT like to Transplant my Starts from small cups to trays to larger Cups. Why yank out a plant by its neck and stuff it into a different pot/soil? All it does is disturbs the Roots and sets the plant back as it recovers.
Start with the larger 18oz cups, plant them once and let em grow.
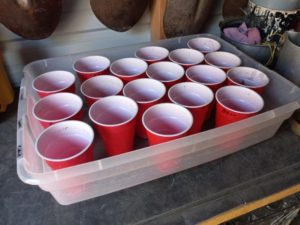
“Trays”
Ok, you’re going to need some Plastic Trays to set the Cups into.
These things are cheap also, I think I spent something like $3.50 each, I have 12 of them that will hold a total of 20 cups each (yes I know I only have 18 in that Photo), but trust me, they will hold 20.
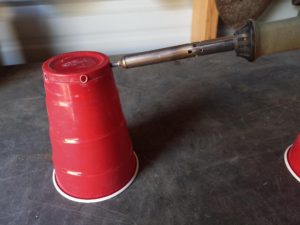
“Holes in Cups”
Now here is the trick and a little time-consuming thing you must do.
Punch a hole in the sides at the bottom of those cups.
I tried to drill them, what a pain in the backside for sure.
Go fine a small Soldering Iron and just “Melt” a hole, a total of 5 holes around the bottom, it’s very VERY easy, just DO NOT breath the fumes.
Ok time to start having some fun……
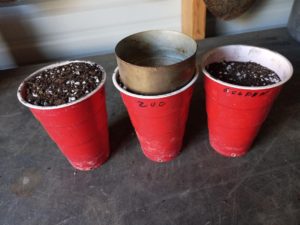
“An Old Tuna Can”
OK, here is the trick, as you fill all those cups, take a Tuna Can and slightly compact the dirt about 1/2 inch. No more than that, you want the dirt still “fluffy” when we are done.
Notice I’m filling some of those old used cups? No problems at all.
Also note that I label the cups with what seeds I plant in them, I mean, if ya plant 240 cups, just try and remember what’s in each one of them……
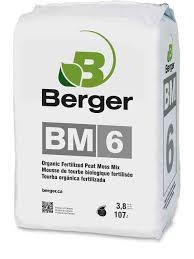
“Potting Soil”
Buy a GOOD Potting Soil, I like this stuff from Berger, I get it from a local Nursery and runs around $27 a block, BUT I’ve been using the same block for 4 years now, and have enough for next year.
I would also recommend Miracle Grow Potting Soil, get the good stuff, not the Gardening Soil, but the Potting Soil, it’s a lot finer.
I would NOT use other Garden Soil or Potting Soil for starting plants; usually it’s not as good. Trust Me.
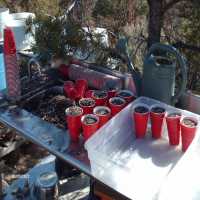
“Fun Time !!!!!”
OK, so you have all the Pots ready, the Trays bought, and the dirt.
Fila a place outside (This is my Potting Table) and get going.
See the “Sink” full of dirt? That’s so I can make sure the soil is all broken up and “Fluffy”. When it comes out of the Brick it can be lumpy and have clumps in it, break it up, get your hands dirty, it’s fun, BTW I don’t wear gloves when I work the Garden, I honestly want to get back to nature and “feel” the soil HAHAHA.
Take a Cup and scoop out a full cup than rake the excess off making the dirt level with the top of the cup…. Next take that Tuna Can and pack the top 1/2 inch.
I would suggest you fill ALL the cups and trays you need at one time, than ya can clean up the mess ya make, especially if you do it inside.

.
“Water”
Water the Trays full of filled Cups, again I suggest doing this outside.
I simply use a Watering Can or Hose with a Sprayer on it.
Gently spray the soil a few times allowing the water to settle in.
Most of the times water WILL run all the way through and collect in the Tray…. Good, you want this; the Soil needs to be “Moist from now on.
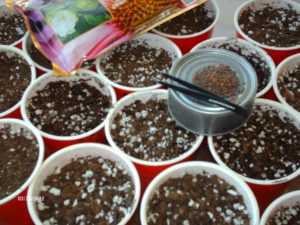
“Planting the Seeds”
Ok, here’s where you need to get all the patience you can muster……
Planting the Seeds, and let me tell ya, those little Cabbage seeds are so friggen tiny they WILL drive ya crazy. BUT take your time and simply place 3 seeds in each cup.
Now remember I did around 160 cups this year, that’s somewhere around 480 seeds…. OMG I got tired of using those Tweezers picking up a seed and placing in the dirt, and remembering if I had 2 or three seeds in there UGHHHHHHH.
A little hint, take a LOT of breaks HAHAHA
Next take those pots with Seeds in them and top them off with a little more soil, rake off even with the top of the cup and mash it down again with that Tuna Can, push it all down till about 1/4 inch below the rim of the top of the cup……
BTW, place all the seeds in a Tray before adding Soil and compacting. Do a quick look-see and make sure you did not miss one or 5 of the cups, ask me way….. HAHAHA
One last thing, Water the Cups again once you’re done planting, I do this several times, the water WILL run through the cups and fill the Trays, that’s OK. As a matter of fact, you want to get the Trays about 1/3 filled with water this first time, this will allow the soil to get really moist.
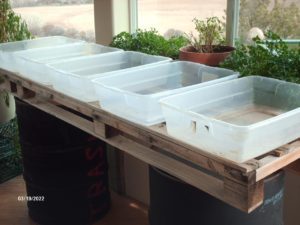
“A Stand by a window”
Ok, somewhere along the way you will need to decide where you want to sprout your Starts. You should choose a place with a LOT of sun and somewhere where the temps will be fairly constant.
If you have a Greenhouse that’s Fantastic; I don’t, I simply use a window in the Living Room that faces South-East.
Notice I use 2 55gallon drums and a Pallet, cheap remember?
This works out just fine, and it gets the plants up high enough for the sun to hit them directly.
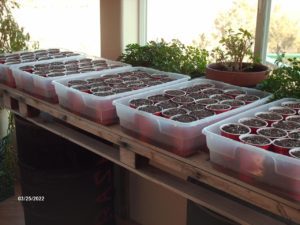
“Done and ready to Grow”
There ya have it, all ready for a few weeks and these puppies will be on the way to grow like CRAZY!!!
Ok, to water these things, Simply pull one of the cups from the corner and fill the tray with a Watering Can or Hose, try to keep the water level in the tray about 1/4 to 1/3 filled. The Cups and Soil will “Wick” the water up.
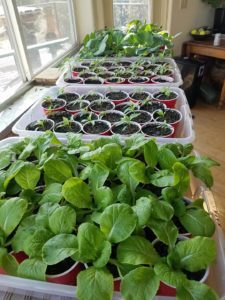
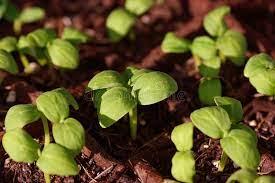
“Yeppers Green”
This is a crop from last year, so ‘Yes’ this method does work well, for me at least.
I believe I set these out about 2-3 weeks after this photo was taken.
OK folks, I know this was a little long, but wanted to make it as simple as I could.
Seriously this method does work well; I have been doing it this way for probably 20 years.
I will be showing you all the rest of the steps in setting up a Garden, and Yes I know there are a million and one ways to Garden, but this seems to work “Ok” for me hehehe.
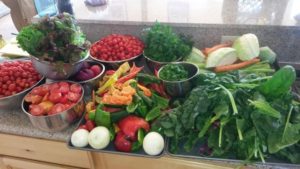
“Just one Picking”
You can do this also…….
Remember, Gardening is meant to be Fun, so PLEASE Enjoy.